This site uses cookies to provide an optimized shopping experience. By using this site, you agree the use of cookies within our privacy policy.
Milwaukee MA957
CO2 Adjustable Solenoid Diaphragm Valve Flow Pressure Regulator
MA957
MA957

Milwaukee MA957
CO2 Adjustable Solenoid Diaphragm Valve Flow Pressure Regulator
MA957
MA957
- For Low Pressure only
- Not for use with a diffuser
- Dual gauges
- For Low Pressure only
- Not for use with a diffuser
- Dual gauges
- Dual reading of both psi & kg/cm
- Valves have dual-scale readings in psi and kg/cm
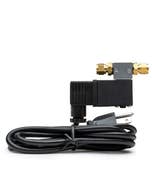
- Solenoid valve has 6ft/1.5m power cord
- CO2 pressure regulator has two valves to independently measure flow rate and remaining CO2 tank contents (CO2 tank sold separately)
The Milwaukee MA957 adjustable flow CO2 pressure regulator has two valves which independently measure flow rate and the remaining CO2 tank contents (CO2 tank sold separately). Each valve has dual-scale readings in psi and kg/cm. The needle-valve flow control provides precise flow adjustment and measurement. The instrument includes a flow regulator, needle valve, electronic solenoid, and bubble counter. The solenoid valve has a 6ft./1.5m power cord.
Regulator Attachment and Use
- Attach the regulator to the cylinder valve, placing the supplied plastic O-ring between the regulator and the tank and tighten with a wrench. Omission of this O-ring will cause loss of gas.
- Unscrew the large brass ring from the bubble counter and fill the bubble counter 1/2 full of fresh water. Be sure the needle valve is closed before filling with water. Once filled replace the brass ring.
- Before opening the cylinder valve turn the regulator adjustment knob counter clockwise until tension is no longer felt on the knob. Do not fully remove the regulator flow adjustment knob. If the cylinder valve is opened with the regulator knob turned in, damage to the regulator diaphragm or right gauge can result.
- Very slowly and carefully open the cylinder valve completely to seal the cylinder valve packing. The amount of gas in the cylinder can now be read on the high pressure gauge.
- Plug the solenoid into a suitable, grounded, AC wall outlet or into your Milwaukee SMS122 Controller. The solenoid uses slightly more than 6 watts and it is normal for it to feel warm during operation.
- Open the needle valve all the way open by turning it counter clockwise.
- Turn the adjustment knob clockwise until you get a reading on the low pressure gauge of approximately 10 lbs or less on the inside set of numbers (psi). You should now see bubbles in the bubble counter. It is recommended that you use the bubble counter rather than the right gauge to determine your flow rate. Only use the needle valve if you can not get exact flow from the adjustment knob.
- Unplug the solenoid from the wall or controller and unscrew the compression fitting and pass the air hose through the fitting and attach your air tubing (not provided in regulator) to the nipple. Be sure your air tube fits tightly on the nipple and is pressed all the way down. Slide the compression fitting onto the nipple and tighten.
- Plug the solenoid back into the wall outlet or pH controller unit and adjust the bubble count on your regulator using the adjustment knob as described in previous adjustment step. Use the needle valve for fine tuning the bubble count if it can not be accomplished with just the adjustment knob.
| Vendor Alias | MA957 |
|---|---|
| UPC | 810666007578 |
| Brand | Milwaukee |
| Condition | NEW |
Customers Also Bought

Milwaukee MA955 Solenoid Valve
$42.72 Price $67.00
Related Products
-
 Milwaukee MA955 Solenoid ValveModel No. MA955Catalog No. MA955$42.72 Price $67.00Log in for member pricingIn stock: 10